How to Create an Automated WhatsApp Chatbot with N8N on Docker
A step-by-step guide to setting up an automated WhatsApp chatbot using N8N and Docker.
Creating an Automated WhatsApp Chatbot with N8N on Docker
In this guide, we will set up an automated WhatsApp chatbot using N8N and Docker. This workflow will allow the bot to receive and respond to WhatsApp messages using the WAHA module.
Step 1: Create the Project Structure
mkdir -p ~/dev/docker/n8n
cd ~/dev/docker/n8n
mkdir n8n_data local_files waha_tmp waha_sessions
Step 2: Create the docker-compose.yml File
Create a docker-compose.yml file and add the following configuration:
services:
  n8n:
    image: docker.n8n.io/n8nio/n8n
    ports:
      - "5678:5678"
    environment:
      - WEBHOOK_URL=http://host.docker.internal:5678
      - GENERIC_TIMEZONE=America/Bahia
    volumes:
      - ./n8n_data:/home/node/.n8n
      - ./local_files:/files
Step 3: Run the Container
docker compose up -d
Access the N8N panel at: http://localhost:5678/
Step 4: Install the WAHA Extension
- Go to Settings > Community Nodes
- Click Install a community node
- Enter the package name:
@devlikeapro/n8n-nodes-waha - Click Install

Step 5: Insert the WAHA Webhook Component
- On the homepage, click Start from scratch
- Click the + button and search for
Waha Trigger - In the component panel, copy the Webhook URL
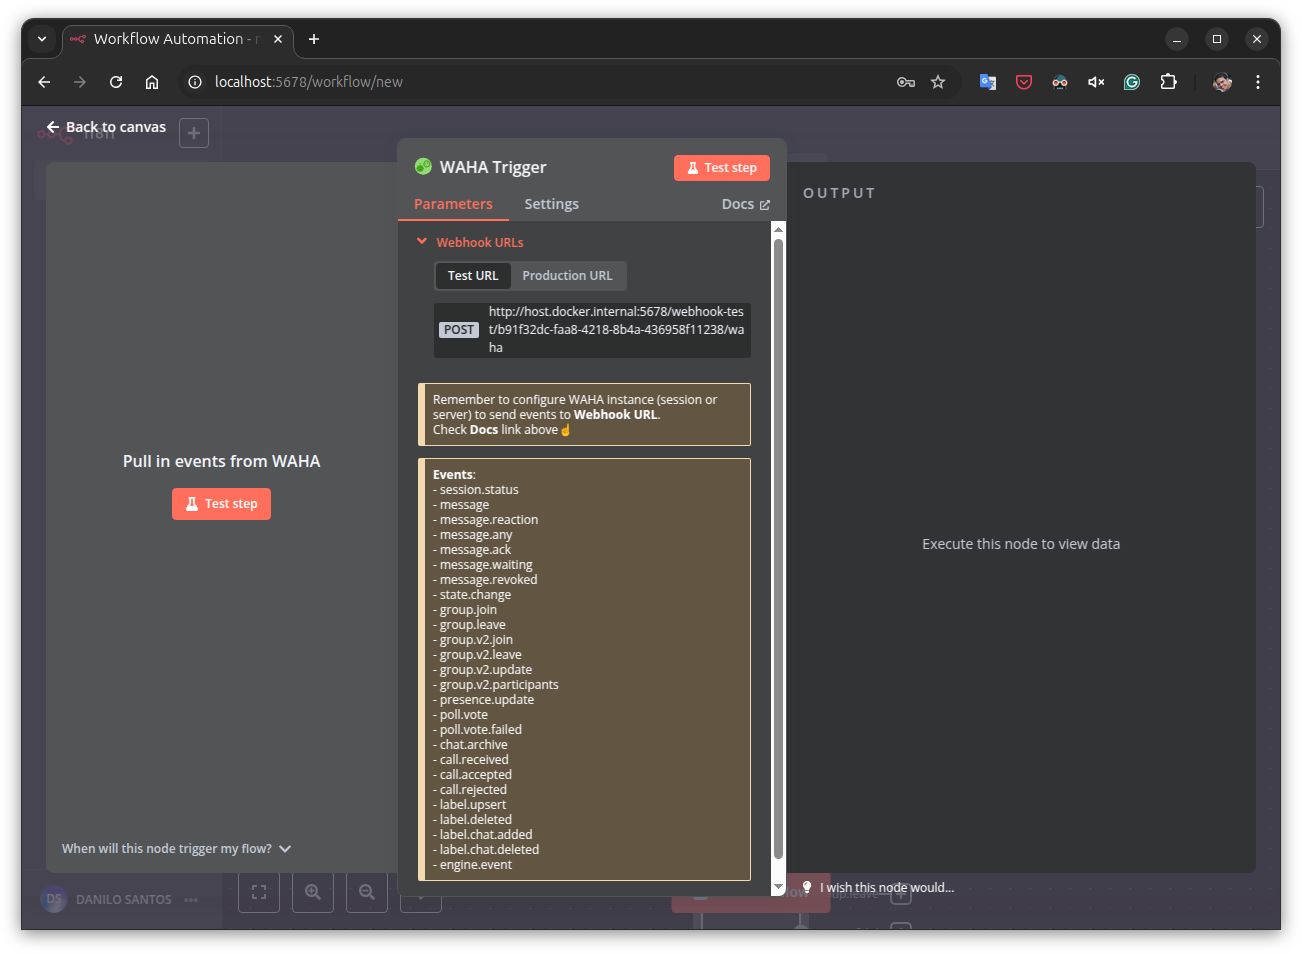
Step 6: Add WAHA Service to docker-compose.yml
Edit docker-compose.yml and add:
  waha:
    image: devlikeapro/waha
    ports:
      - "3000:3000"
    environment:
      - WHATSAPP_DEFAULT_ENGINE=NOWEB
      - WHATSAPP_HOOK_EVENTS=message
      - WHATSAPP_HOOK_URL=http://n8n:5678/webhook-test/{YOUR-WEBHOOK-URL}/waha
    volumes:
      - ./waha_tmp:/tmp
      - ./waha_sessions:/app/.sessions
Replace WHATSAPP_HOOK_URL with the copied Webhook URL and change the domain to n8n.
Restart the containers:
docker compose up -d
Access the WAHA panel: http://localhost:3000/dashboard/
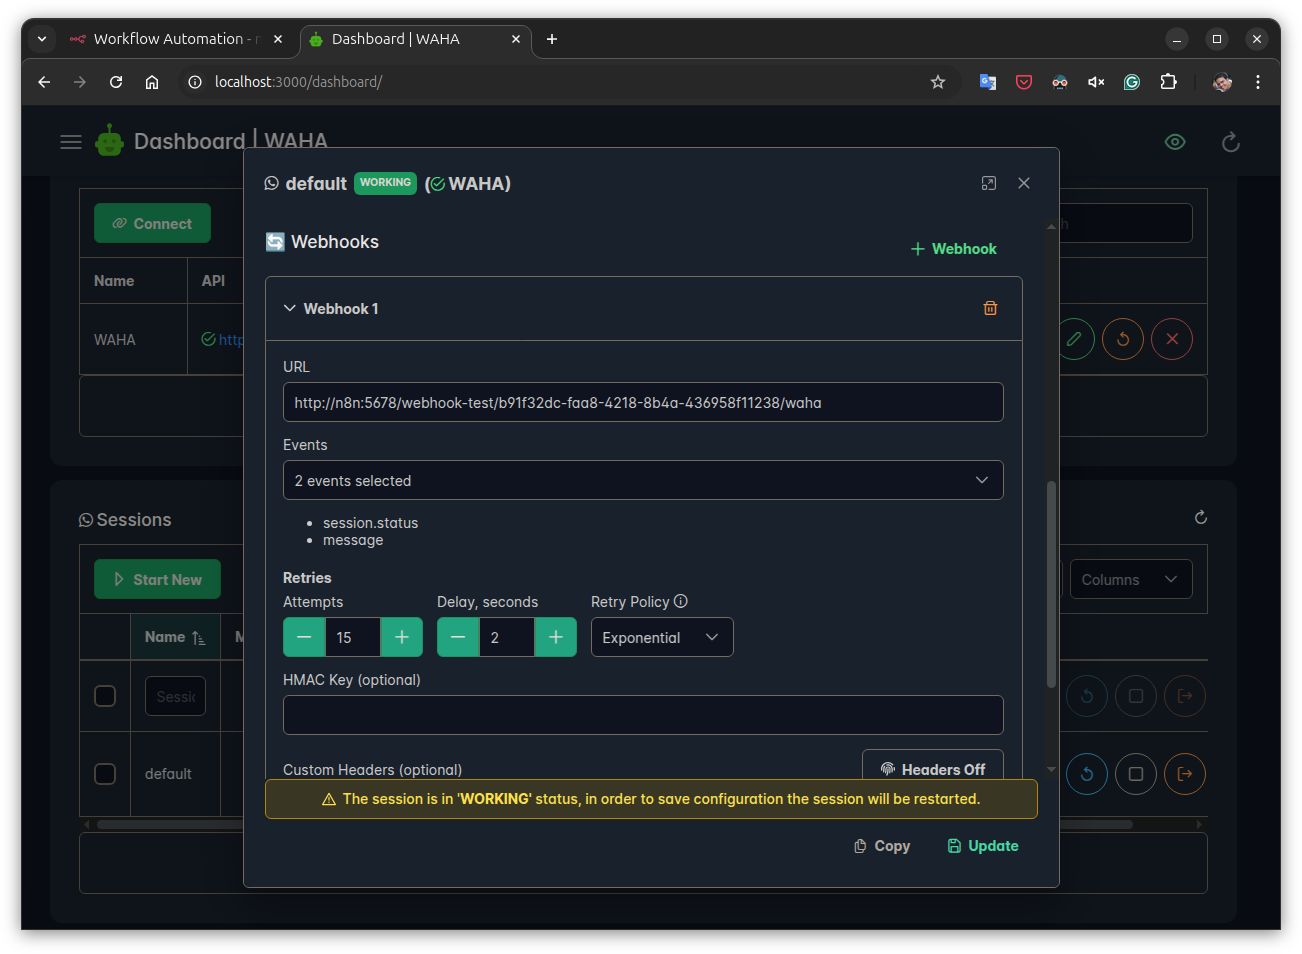
Step 7: Link WAHA to WhatsApp
- In the WAHA panel, go to Sessions
- Click Start on the
defaultrow - Click Login to generate the QR Code
- On your phone, open WhatsApp and scan the QR Code
- Still on the
defaultrow, click Configuration, scroll down to Webhooks, click +Webhook, and add the Webhook URL from N8N - Click Update
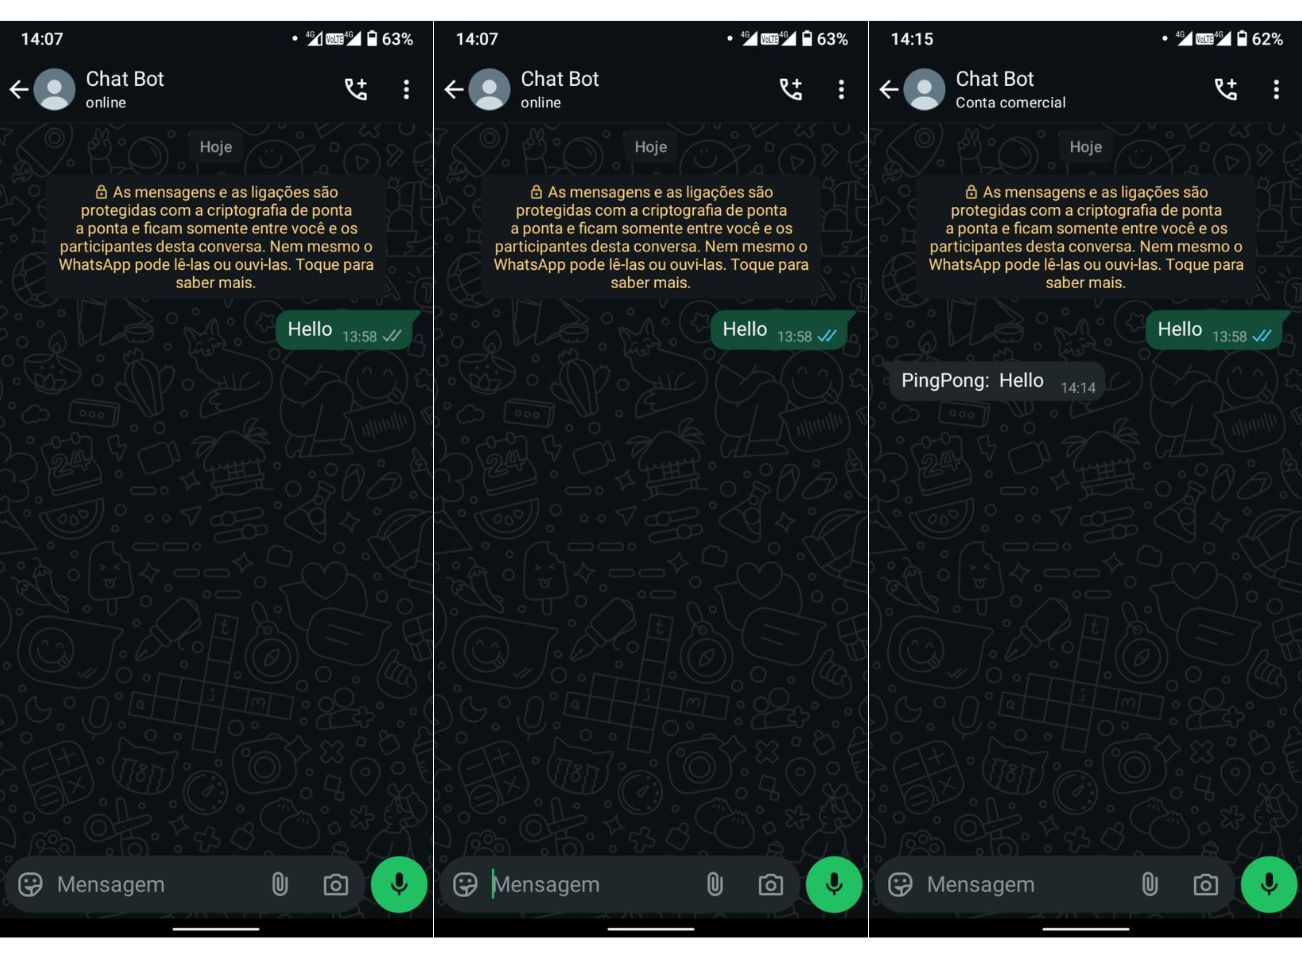
Step 8: Test the Webhook
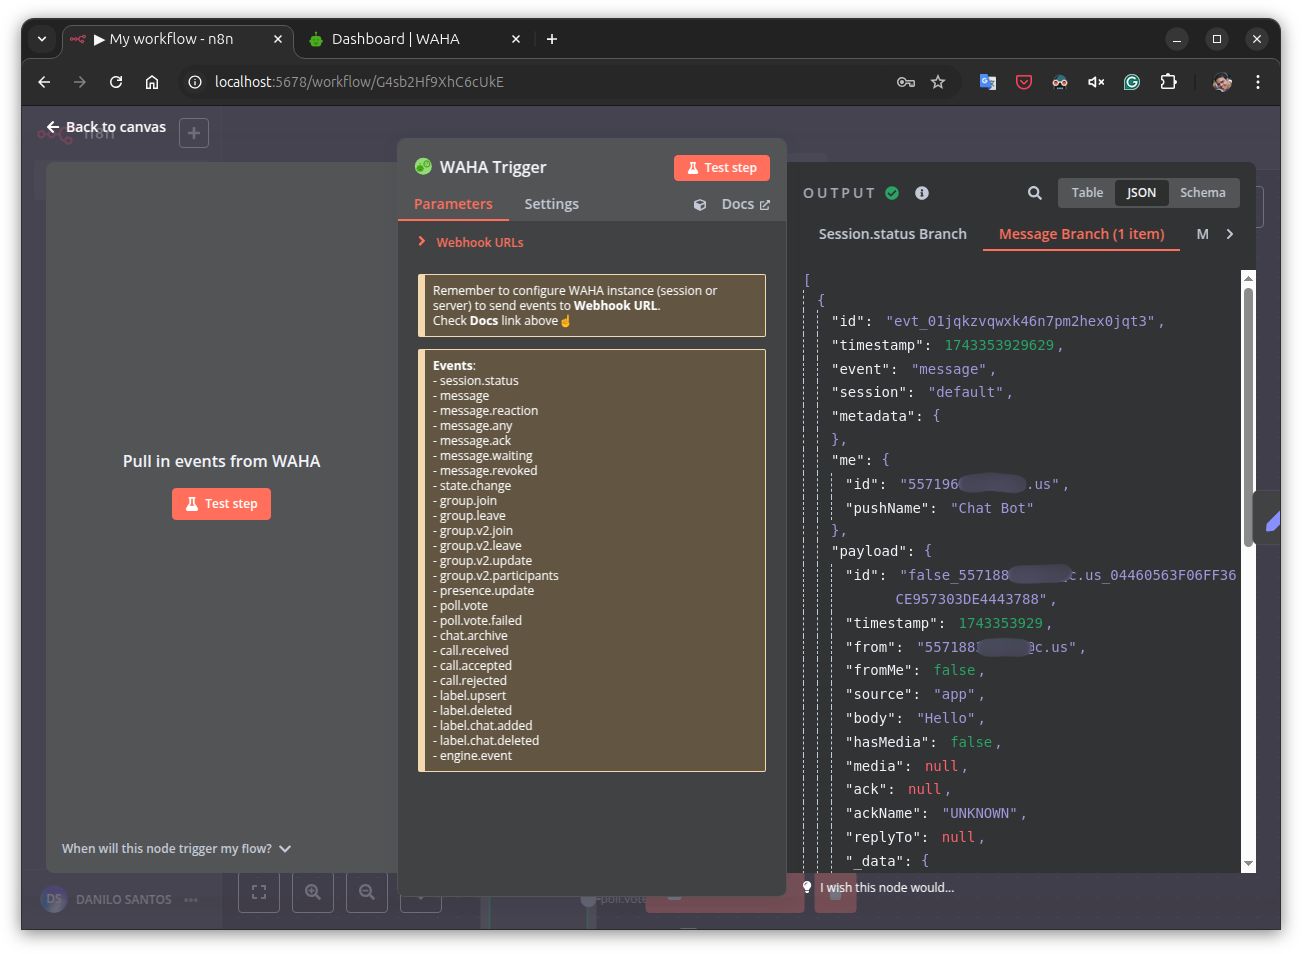
- In N8N, click Test step inside the Waha Trigger component
- Send a message via WhatsApp
- N8N will display the received data
- Click Message Branch(1 item) to view the details
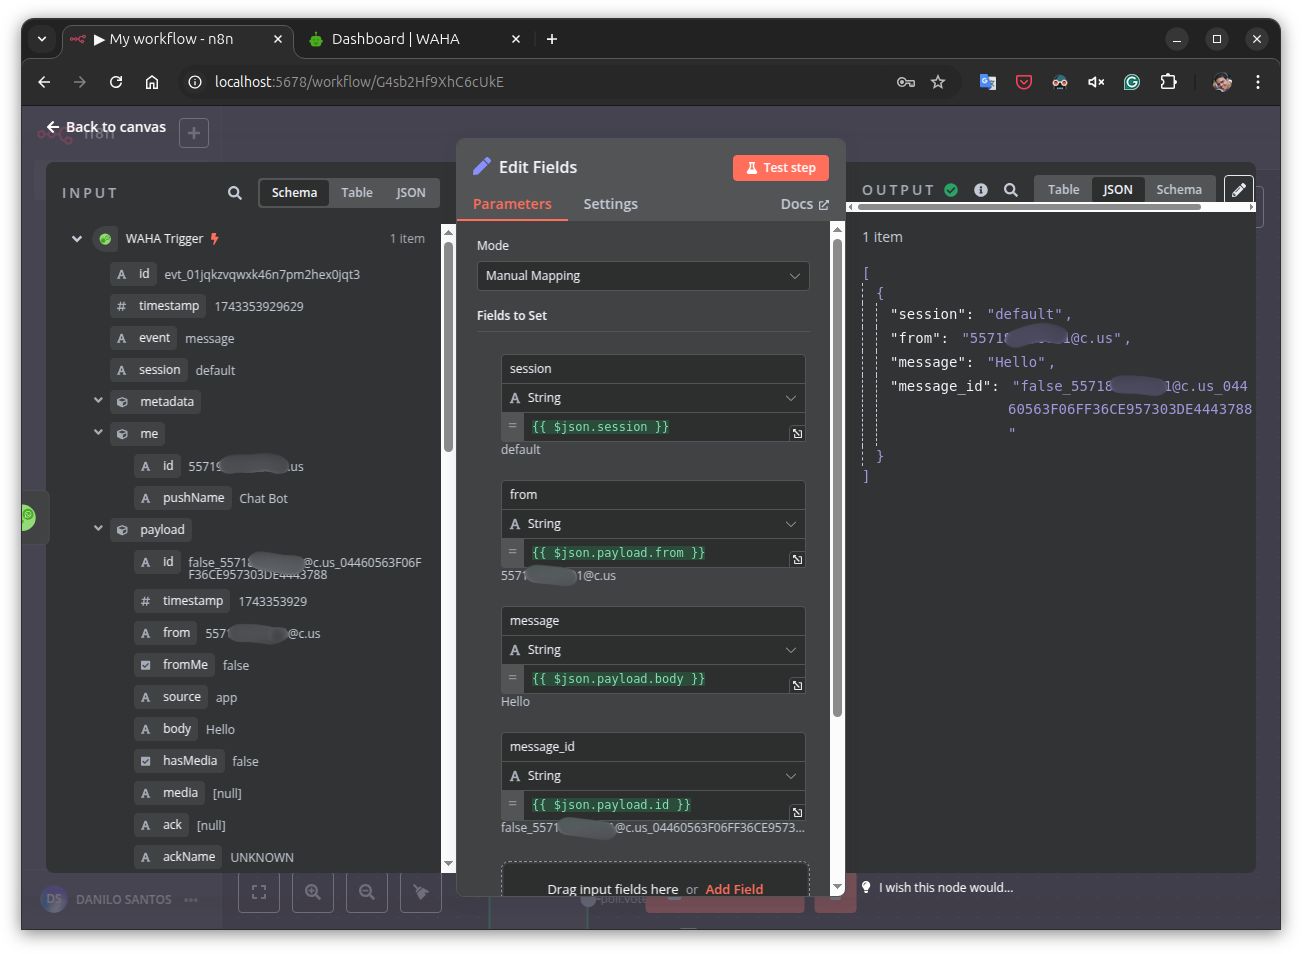
Step 9: Parse Received Messages
- Add the Edit Fields (Set) component
- Configure the following fields:
session:json.sessionfrom:json.payload.frommessage:json.payload.bodymessage_id:json.payload.id
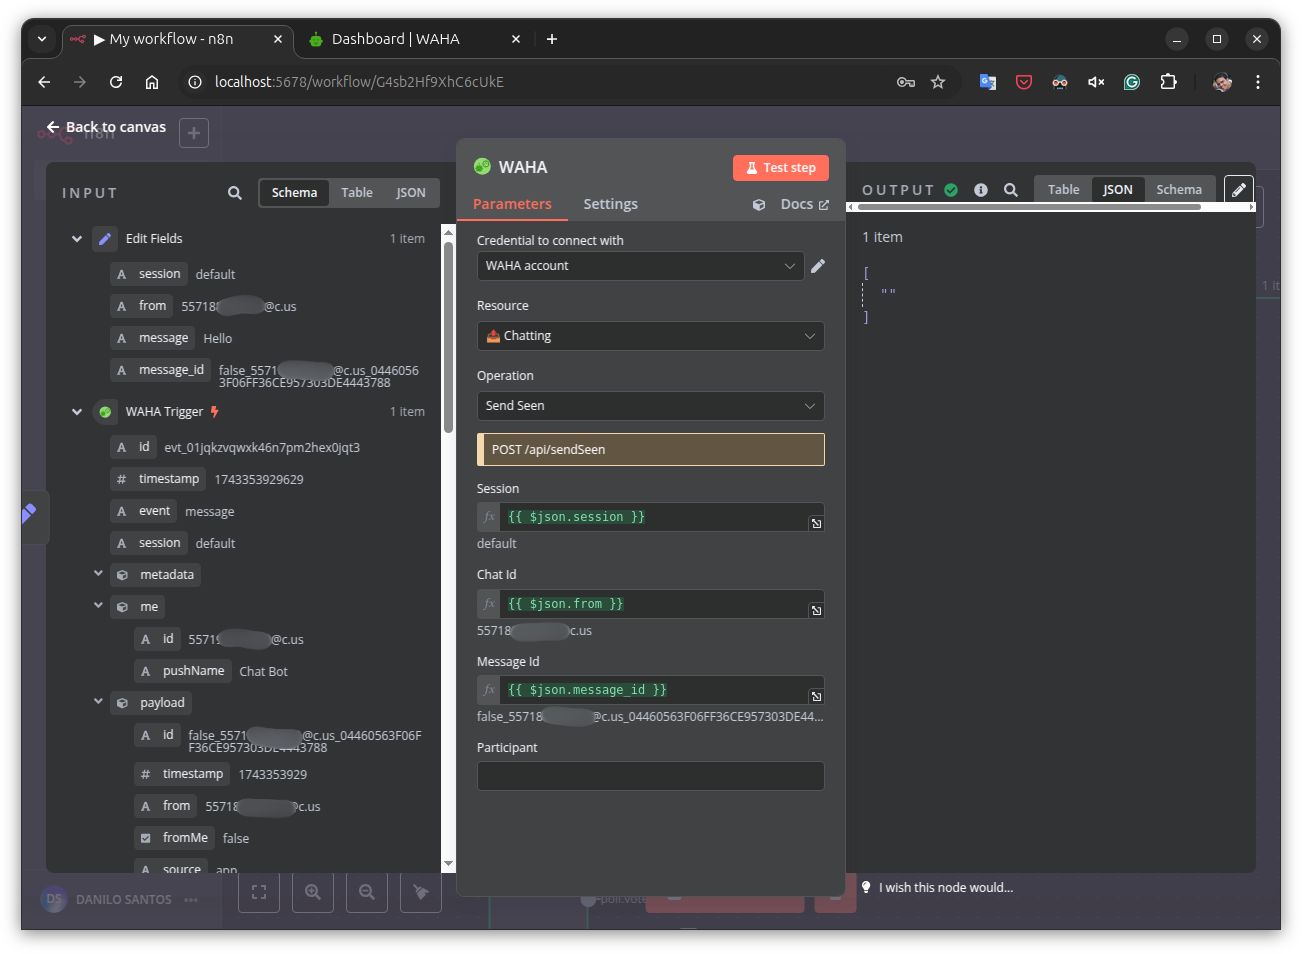
Step 10: Send Read Confirmation (✔✔ Blue Checks)
- Click the Edit Fields (Set) branch and add the WAHA Send Seen component
- Create a credential under Credential to connect with, setting Host URL to
http://waha:3000 - Configure the fields:
Session:json.sessionChat Id:json.fromMessage Id:json.message_idParticipant: (Leave empty)
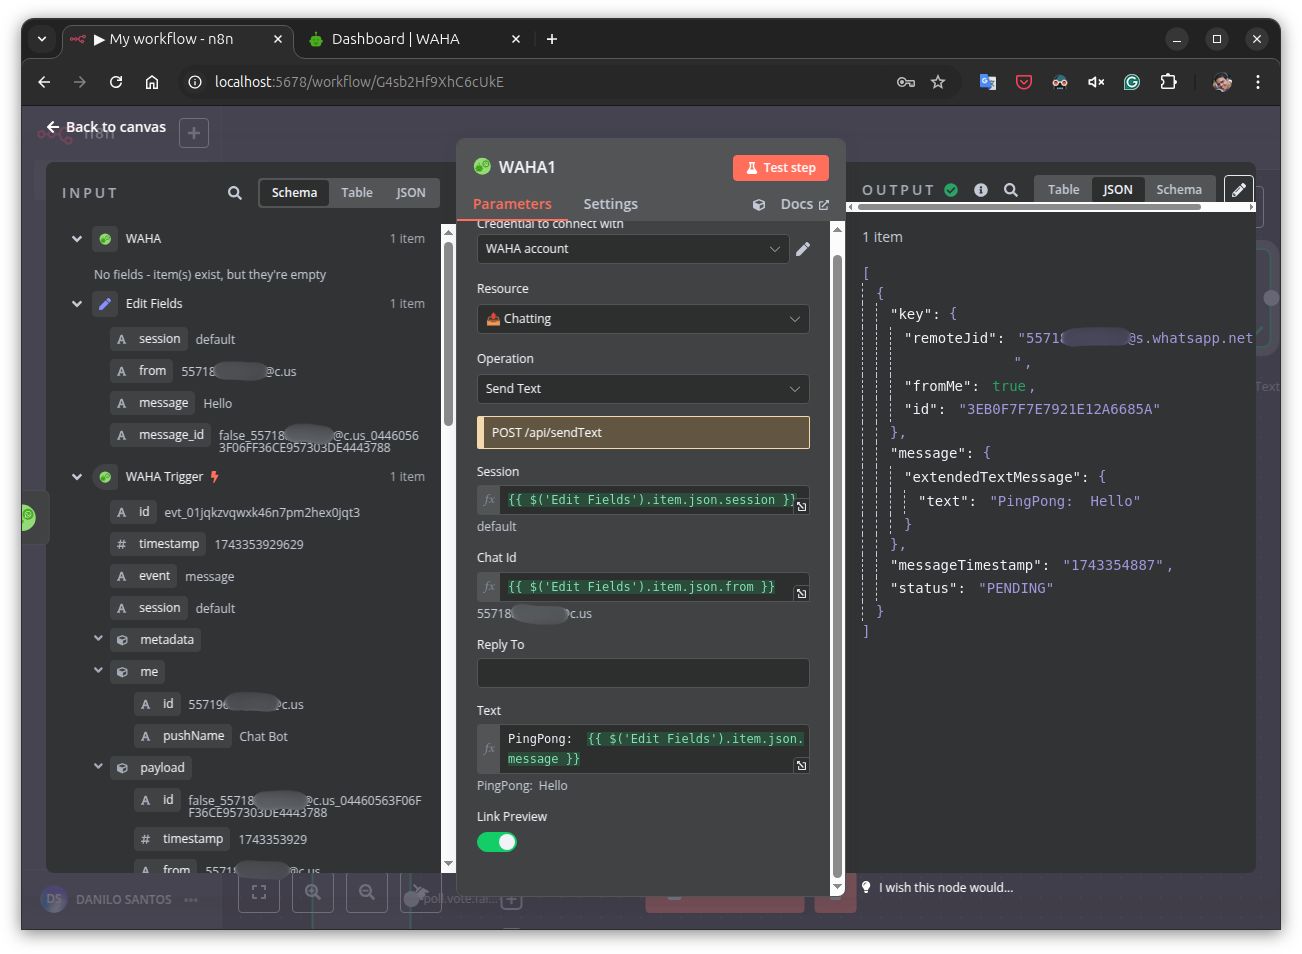
Step 11: Send an Automated Response
- Click the Send Seen branch and add the WAHA Send a text message component
- Configure the fields:
Session:json.sessionChat Id:json.fromText:PingPong: json.message
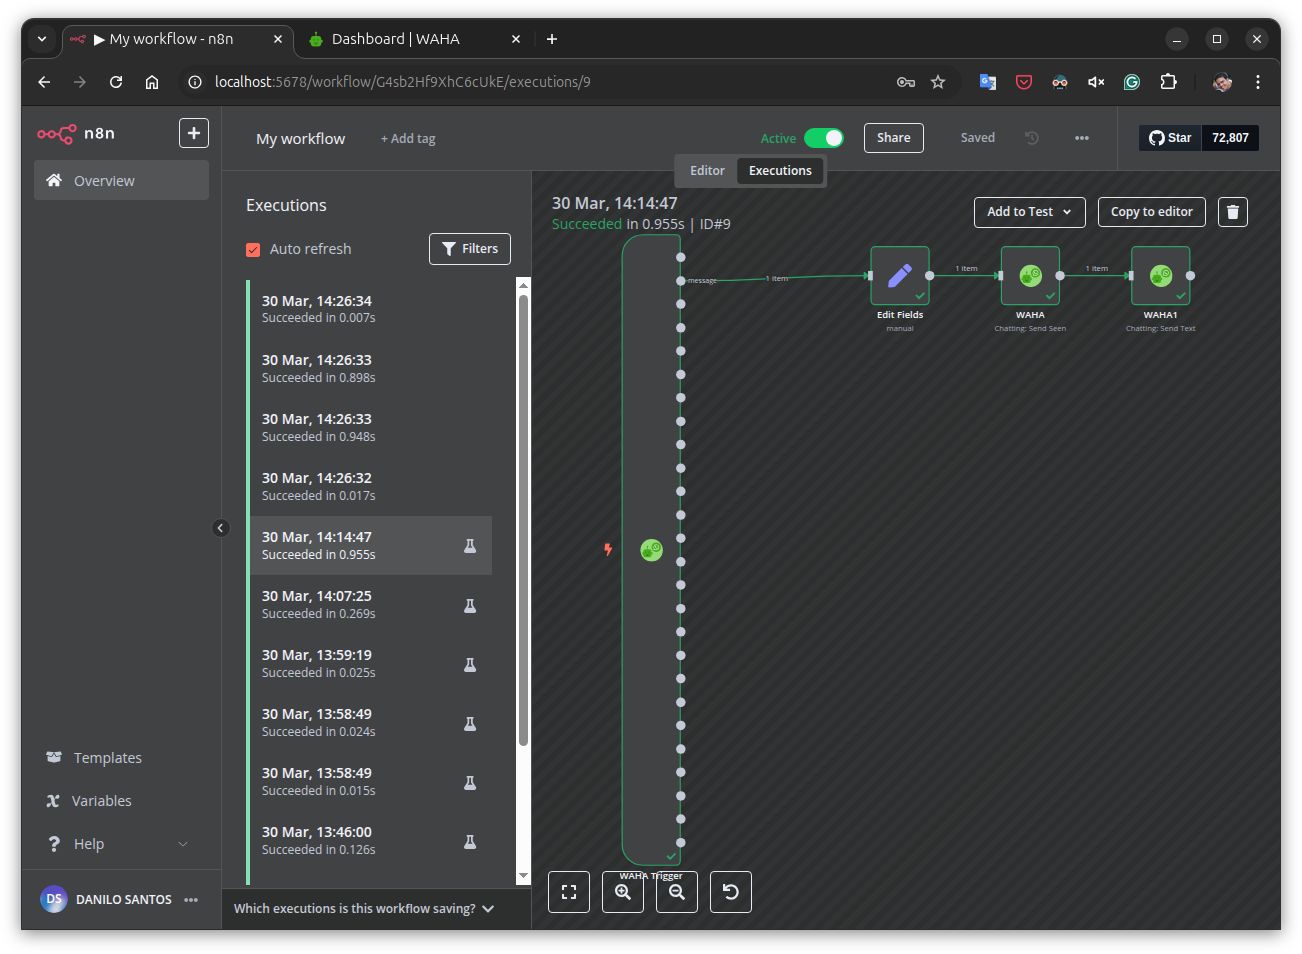
Step 12: Run the Complete Workflow
- Stop the containers:
docker compose down - Replace
WHATSAPP_HOOK_URLindocker-compose.ymlwith the production Webhook URL - Restart the containers:
docker compose up -d - In N8N, activate the workflow
- In WAHA, click Start in the default session, then go to Configuration to update the Webhook URL
- In N8N, click Executions to see the workflow running
- Test by sending a WhatsApp message to see the execution in action
Conclusion
Now you have an automated WhatsApp chatbot using N8N and WAHA. This workflow can be expanded to respond to specific commands, integrate with databases, and much more!